
How to Handle Hiking Emergencies Safely in 2026
TL;DR:
- Handling hiking emergencies requires staying calm, assessing injuries quickly, and using proper communication and first aid techniques to ensure safety. Proper gear, training, and clear signals enable effective responses in remote terrain where cell service is unreliable. Making informed evacuation decisions based on injury severity and conditions is crucial for minimizing risks and ensuring quick rescue.
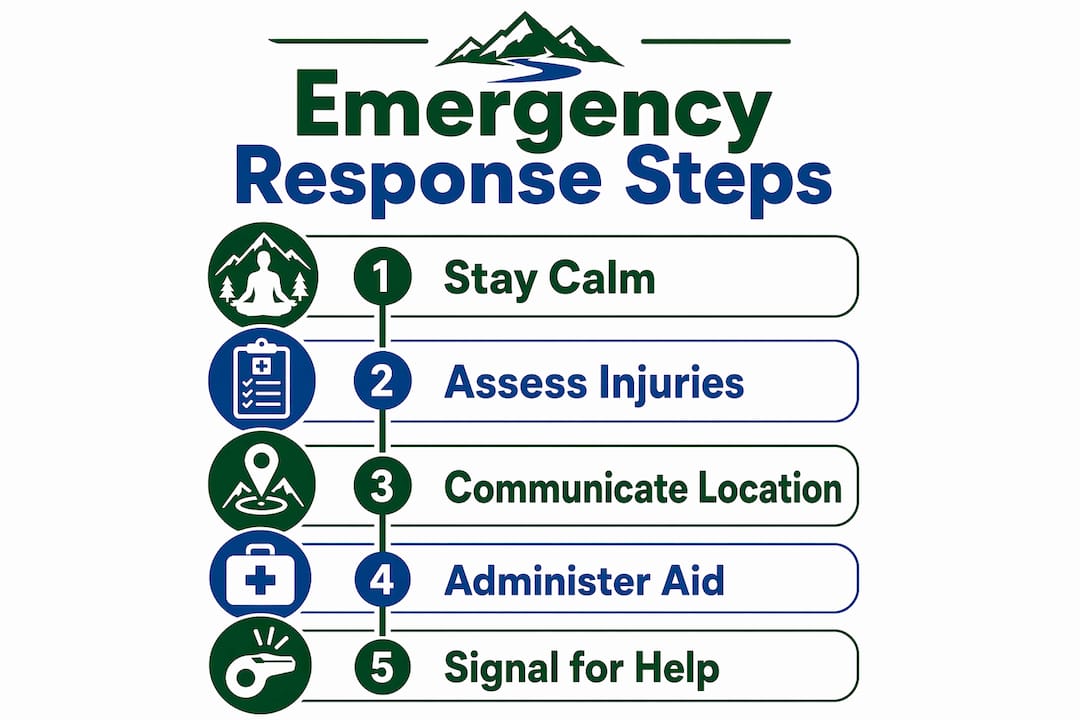
Handling hiking emergencies means staying calm, assessing injuries quickly, communicating your location clearly, and using the right first aid and survival techniques to protect yourself and others. Every year, hikers face situations ranging from twisted ankles to life-threatening falls, and the difference between a close call and a tragedy almost always comes down to preparation. Knowing how to handle hiking emergencies before you hit the trail is not optional. It is the skill set that keeps you and your group safe when things go wrong in remote terrain.
What should you carry to prepare for hiking emergencies?
The right gear does not just make your hike more comfortable. It gives you the tools to respond when something goes wrong. The U.S. National Park Service’s 10 Essentials form the foundation of emergency preparedness for hiking: a first aid kit, emergency shelter, headlamp, fire starter, navigation tools, sun protection, insulation layers, water and purification, food, and a knife. Each item addresses a specific failure point that backcountry hikers face.
Communication is where many hikers fall short. Cell phone reception is unpredictable on trails and often completely unavailable in remote or mountainous areas. That means you need multiple communication tools. A whistle costs almost nothing and carries farther than your voice. A signaling mirror works in daylight when batteries are dead. Satellite messengers like the Garmin inReach Mini 2 or the Apple Watch Ultra satellite SOS function work where no cell tower exists.
Here is how to think about your communication layers:
- Primary: Cell phone (useful in many areas, unreliable in remote terrain)
- Secondary: Satellite messenger or personal locator beacon (PLB)
- Tertiary: Whistle, signaling mirror, or brightly colored gear for visual signals
Shelter is equally critical. The NPS recommends tents, tarps, bivy sacks, or emergency space blankets as shelter options. A space blanket weighs almost nothing and can prevent hypothermia in a sudden weather shift. Waterproof layers and insulation belong in your pack even on clear-sky days, because mountain weather changes fast.
Pro Tip: Pack your emergency gear in a bright-colored dry bag at the top of your pack. In a real emergency, you should not be digging through snacks to find your first aid kit.
| Gear item | Why it matters in an emergency |
|---|---|
| First aid kit | Treats wounds, stabilizes fractures, and manages allergic reactions |
| Satellite messenger | Sends SOS when cell service is unavailable |
| Emergency shelter | Prevents hypothermia during unexpected weather or overnight delays |
| Headlamp with extra batteries | Allows safe movement and signaling after dark |
| Whistle | Carries sound farther than the human voice with minimal effort |
Check out the backpacking gear checklist from Wilderness Today for a detailed breakdown of what to pack for different trail conditions.
How do you assess and respond to injuries during a hiking emergency?
Wilderness first aid, the recognized industry term for backcountry medical response, is different from urban first aid. NOLS Wilderness First Aid training teaches the Patient Assessment System (PAS), a structured approach to evaluating an injured hiker when emergency medical services may be eight or more hours away. The PAS keeps you from missing hidden injuries while you focus on the obvious ones.
Follow these steps when someone in your group is injured:
- Check scene safety. Before approaching, confirm there is no ongoing hazard. A rockfall zone, unstable terrain, or a downed tree can injure rescuers too.
- Establish responsiveness. Speak to the patient. If they do not respond, check for breathing and pulse immediately.
- Control severe bleeding. Apply direct pressure with the cleanest material available. Do not remove a dressing once it is in place.
- Assess for shock. Signs include pale or gray skin, rapid shallow breathing, confusion, and weakness. Lay the patient flat and keep them warm.
- Check for fractures and spinal injury. Ask about pain, numbness, or tingling. Do not move a patient with suspected spinal injury unless they are in immediate danger.
- Treat wounds. Clean cuts with clean water, cover with sterile dressings, and monitor for infection signs over the following hours.
Anaphylaxis deserves special attention. Epinephrine is the only drug that stops life-threatening allergic reactions. Antihistamines like Benadryl treat hives but do not replace epinephrine. Biphasic reactions, where symptoms return hours after the first episode, occur in up to 20% of anaphylaxis cases. This means evacuation is mandatory even after a patient appears to recover.
Pro Tip: If anyone in your group has a known allergy, make sure at least two people know where the epinephrine auto-injector is stored and how to use it before you leave the trailhead.
Splinting a fracture in the field does not require a medical kit. A trekking pole, stiff branch, or rolled sleeping pad secured with bandanas or strips of clothing works well. The goal is immobilization, not perfection.
What are effective ways to signal for help in remote areas?
Getting help fast depends on two things: how clearly you signal distress and how precisely you communicate your location. Rescuers’ ability to respond quickly depends as much on your exact location as on what happened. A vague description of “somewhere near the ridge” delays response significantly.
The standard distress signal is three short calls, repeated at regular intervals. This applies to a whistle, a flashlight, or mirror flashes. Rescuers are trained to acknowledge with two calls and then approach. Three is the universal number for distress in wilderness contexts.
Practical signaling tips:
- Use a mirror to flash toward aircraft or distant ridgelines during daylight hours
- At night, a headlamp pointed skyward in three-flash bursts is visible for miles
- Bright gear, tarps, or clothing laid in an open area creates a visible ground signal for aerial search
- If you have a satellite messenger, activate the SOS function and leave it on. The device continues broadcasting your GPS coordinates even if you cannot operate it
When you call 911 or use a satellite SOS, give dispatchers your GPS coordinates if you have them, the name of the trail or park, the nature of the emergency, the number of people in your group, and any medical conditions relevant to the patient. The Appalachian Trail Conservancy notes that ATC guidebooks list backup emergency numbers when 911 is unavailable. Carry that information in print, not just on your phone.
Signaling protocols reduce response time because rescuers immediately recognize the meaning of a three-signal pattern. Groups that pre-agree on simple signals before a hike improve recognition under stress. Discuss your emergency communication plan at the trailhead, not after something goes wrong.
How should you make evacuation decisions during a hiking emergency?
Evacuation decision-making is where outdoor emergency response gets genuinely difficult. The wrong call can worsen an injury or exhaust your group before help arrives. Effective evacuation decisions rely on categorizing the situation into one of three frameworks: Go Fast, Go Slow, or Stay Put.
Go Fast means immediate evacuation by the fastest available means. This applies to uncontrolled bleeding, anaphylaxis, suspected spinal injury, altered mental status, or any condition that is deteriorating rapidly. Go Slow means the patient can walk out with assistance or be carried at a measured pace. Stable fractures, moderate sprains, and controlled wounds often fall here. Stay Put means the patient needs rest and monitoring, and movement would cause more harm than waiting for rescue.
Factors that influence your decision include injury severity, weather conditions, distance to the trailhead, group size, available gear, and how long it will take EMS to reach you. A wilderness first aid certification from NOLS or SOLO Schools teaches you to weigh these factors systematically rather than guessing under pressure.
Common evacuation mistakes to avoid:
- Moving a patient with suspected spinal injury without proper stabilization
- Splitting a small group so that the injured person is left alone
- Attempting a technical descent in the dark without adequate lighting
- Failing to document the patient’s condition changes over time
Documentation matters more than most hikers realize. SOAP notes, a format used in wilderness medicine that stands for Subjective, Objective, Assessment, and Plan, give rescue teams a clear picture of what happened and how the patient has changed. Write notes on paper, not just in your phone. Batteries die.
Understanding physical maps and navigation is also critical here. Knowing your exact position on a topographic map helps you identify the fastest safe route out, which is information no GPS app can fully replace when service is unavailable.
Key takeaways
Handling hiking emergencies effectively requires gear, training, and calm decision-making working together before and during any backcountry incident.
| Point | Details |
|---|---|
| Carry layered communication tools | A satellite messenger, whistle, and signaling mirror cover gaps where cell service fails. |
| Use the Patient Assessment System | Start with scene safety, then work through responsiveness, bleeding, shock, and fractures in order. |
| Know your evacuation category | Go Fast, Go Slow, or Stay Put decisions depend on injury severity, weather, and distance to help. |
| Signal with three short calls | Three whistle blasts, mirror flashes, or flashlight pulses is the universal wilderness distress signal. |
| Train before you need the skills | NOLS Wilderness First Aid certification prepares you to act as a remote care provider for up to eight hours without EMS. |
What I’ve learned from years on remote trails
I have guided and hiked across some of the most remote terrain in the Balkans, and the pattern I see repeated is always the same. Hikers invest in boots, poles, and technical layers, but they skip the one thing that actually saves lives: training. A first aid kit without the knowledge to use it is just extra weight.
The wilderness first aid courses offered by NOLS and SOLO Schools are not just for guides or medical professionals. They are for anyone who spends serious time on trail. The Patient Assessment System sounds clinical, but after one weekend of practice, it becomes instinct. That instinct is what keeps you from panicking when a hiking partner goes down on a ridge with no cell signal.
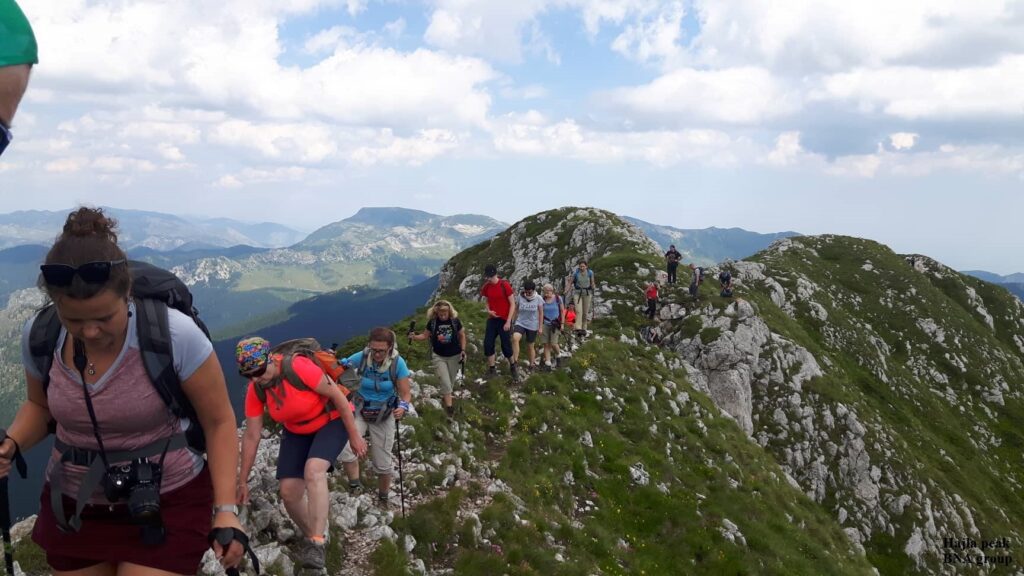
I also want to push back on the idea that satellite messengers are optional gear. On the Peaks of the Balkans trail and similar multi-day routes through remote mountain terrain, cell service disappears for hours at a time. A Garmin inReach Mini 2 weighs 100 grams. There is no reasonable argument for leaving it at home.
The other thing I have learned is that calm is a skill, not a personality trait. You practice it by rehearsing scenarios before you need them. Talk through your emergency plan with your group at the trailhead. Agree on your distress signals. Know who carries the epinephrine. These conversations take five minutes and they matter enormously when something goes wrong.
Hiking in groups also changes your options significantly. A solo hiker with a sprained ankle faces a very different situation than a group of four with the same injury. If you are new to remote hiking, group trekking is a genuinely safer way to build experience and confidence before heading out alone.
— Virtyt
Plan your next hike with safety built in from the start
Peaksofthebalkans is built to help you hike smarter, not just farther. Whether you are planning your first multi-day route or looking to sharpen your emergency preparedness before heading into the backcountry, the resources here cover everything from trail navigation to gear selection. Start with the guide on hiking with maps to understand how topographic reading supports every emergency decision you might face on trail. When you are ready to explore the Peaks of the Balkans trail with expert support, visit Peaksofthebalkans to browse guided tour options and plan your adventure with confidence.
FAQ
What is the first thing to do in a hiking emergency?
Determine your location first, then assess the injured person using the Patient Assessment System. Call 911 if you have cell service, or activate a satellite SOS device if you do not.
What distress signal should hikers use?
Three short whistle blasts, repeated at regular intervals, is the universal distress signal in wilderness settings. Rescuers respond with two calls and then approach.
When should you evacuate versus stay put after a hiking injury?
Go Fast for uncontrolled bleeding, anaphylaxis, or deteriorating mental status. Stay Put when rest and monitoring will allow recovery without worsening the patient’s condition.
Is a satellite messenger necessary for hiking?
Yes, for any remote or mountainous trail. Cell service is unreliable in backcountry areas, and satellite messengers like the Garmin inReach Mini 2 provide SOS capability regardless of cell coverage.
What does wilderness first aid training cover?
NOLS Wilderness First Aid teaches patient assessment, injury treatment, and evacuation decision-making for situations where EMS response may take eight or more hours.